All the good things – check

It has been sometime that I posted in this topic 🙂 Lots to be grateful for!

  • sleeping well and getting up early – check

as I had expressed a few times before, the self-isolation and working from home have been good for my work-related stress and insomnia. I am very grateful for the restful sleep I get almost every night and the optimistic mornings 🙂

  • enjoying my morning coffee and afternoon tea – check

coffee may be the most exciting treat I can ever give myself. Every single morning I find it loved, enjoyed, and wanted. Isn’t this real love?

And tea with lemon, honey, and ginger. It can be the second best treat I can give myself, almost every day now during the pandemic. I kind of feel that it is therapeutic and I am so eager to have it. A very soft, enjoyable drink. We are lucky indeed to have coffee and tea in our lives.

  • walking an hour while also enjoying the soft, bright, and cool air around me – check

it was delicious. The walk. The softness of the air around me. The feeling of being surrounded by a healing air….Delicious.

  • working from home and making things happen – check

it was yet another day where I was able to handle a number of things nice and easy, and bring solutions to them. I was not stressed at all, and things went well.

  • being anxiety free so far today – check

I have not had fear or anxiety-creating thoughts today – how wonderful is this? 🙂

  • for completing mulching my yard – check

yes, I have completed the mulching saga! I think it is good, but I will have to see how the mulch stays and behaves over time. I have additional bags of mulch in case I will need them – this makes me feel good. I want to buy some bushes and plant flowers in pots and place them around the yard. I hope I can do this this year. Looks like we will have a warm summer and I would love to spend some time in my yard. It is going to be so good 🙂

  • speaking with my family and having laughs – check

I spoke with mom, sis, and bro – the complete family 🙂 we had great laughs. They feel the stress of the pandemic as well, but are trying to keep things and minds in place. It was lovely to be with them, even through internet. It is funny how now online meetings are becoming a norm…...

  • eating healthy and tasty food – check

I ate a broccoli salad

(steam it; add garlic, lemon juice, olive oil, sesame seeds, and vinegar together and whisk into a sauce, and Voila! – you have a beautiful, healthy salad)

and my specialty soup

(add 1 cup of red lentil, 1/3 cup of wild rice, 1 potato (diced), 1-2 tbs of butter and 2 cups of water, and cook till the wild rice is soft – and Voila! you have a hearty and healthy soup that will fill your stomach and make your body happy!)

It was awesome to have these two together – give it a try 🙂


carrot jam :)

I did not even think that it was possible or tasty, but I was wrong. Carrot jam is must to try 🙂

I was looking for an interesting jam/marmalade to try and it was the carrot jam that intrigued me. Thanking bloggers out there who have posted their recipes. I improvised my recipe and I am very pleased with the end result.

Addition of orange to this jam kind of masks the “veggie” smell/taste of carrot. Next time  I want to try it with some nuts, like walnut, for a much tastier and crunchier version.

Ingredients:

  • 8 mid-size carrots
  • 1 extra large orange
  • 1.5 lemon
  • 6 cups water
  • 4 cups sugar
  • 2 tbs salt

Recipe:

  • peel the carrots and cut in thin stripes – julienne (my new mandolin slicer did not work out well, what a waste of money, so I cut them using a knife)
  • peel the orange, scrap off the white coat, piece and add to carrots
  • add 4 cups of sugar, mix, and let stand for 1-2 hours (continue to mix it every once a while – it should get juicy at the end of the waiting period)
  • add water and salt, and bring to a rolling boil, continue to boil for 30 min at medium heat
  • add the orange peels (once the orange is peeled, put the peels in 1/4 vinegar/water mix, let stand for 30 min, scrap off the white coat, and slice thinly) and 10 tbs of lemon juice
  • boil for another 25-30 min, until it reduces to 1/3 of the initial volume and thickens
  • pour down the sterilized jars, close the lids, and rings.
  • Water or pressure can for long-term preservation. If not, keep it in the fridge and consume within weeks.

Bon appetite!

Sunday sourdough

I was trying to find the ways to reduce the proofing time lately: one thing I have tried in the last two weeks is proofing the dough in an oven (not turned or warmed up; no lights , either) to see whether this relatively temperature-wise stable environment would help reduce it. 

This dough was only proved for 3 hours (in contrast to my usual 4-6 hours proofing). It was almost flat when I placed it on the parchment paper and scored. But there was a great oven spring (just like last week), so it turned out to be just lovely.

I think the in-oven proofing helped. I also think that maybe in the past I was over-proofing my dough..

Of course, the hydration levels of the dough makes a difference in terms of the yeast activity – this was a slightly sticky dough. This may be another reason for the short proof time working with this loaf.

In any way, I am just happy to have this loaf 🙂


happy sourdough – III


IMG_3460
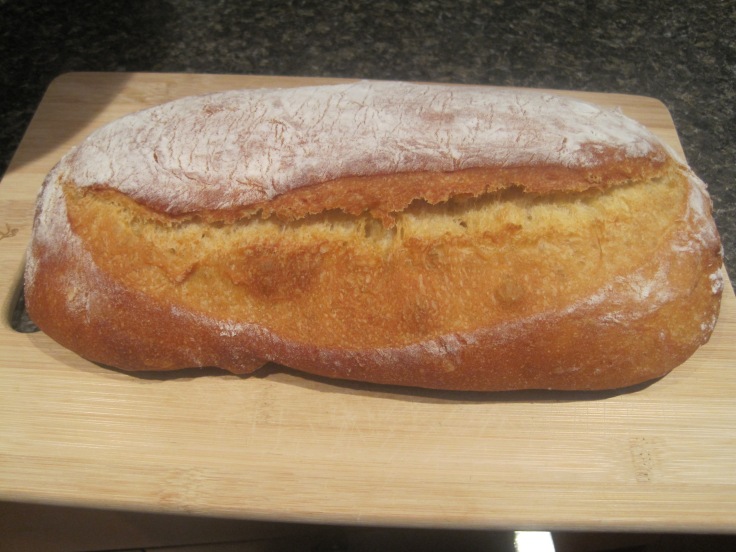
Isn’t it beautiful 🙂

This was the first time that I tried 3 hours of proofing. When I took it out of the shaping bowl and scored, the dough was almost flat. But in the oven it showed a great oven spring and one of the largest air pockets I have ever seen. It even cracked itself on top even though I had slashed it, which tells me that yeast really worked hard this time.

Will continue like this – it has been a great experiment.

clementine preserve

Yours truly tried yet another food preservation attempt, this time using whole clementines.

The recipe is inspired from a recipe of my mom.


Ingredients

  • 8 clementine
  • 4 cups water
  • 2 cups sugar
  • 3.5 tbs of lemon juice
  • 1 tsp salt


recipe

  • wash the clementines and remove the stalk at the bottom
  • insert knife in 8-10 places throughout the clementines
  • add sugar and water, mix, and wait for 50 min
  • put on the stove and cook at medium heat for 70 min

      *at this point clementines should be softened and if you press lightly they should feel plump

  • add the salt and lemon juice and boil for another 30 min
  • pour in sterilized jars, close the lids, and rings. Makes 1 x 750 ml preserve
  • water or pressure can if you wish. I do not do either of this. So they will be kept at the fridge and consumed within weeks

Bon appetite! 🙂

butternut squash dessert and weekly sourdough bread

Butternut squash dessert

I found a nice butternut squash the week before. My original aim was to make a hearty soup, but I decided in the last moment to make a dessert with it.

here is the recipe:

  • peel the coating and cut in pieces (mine were around 1-5 cm width and 7 cm length)
  • add 2 cups of sugar, mix
  • add 1.5 tsp salt and 6 cups of water
  • bring to a rolling boil and simmer at medium heat for 40 min
  • add 1.5 tbs lemon juice and boil for another 5 min
  • take the squash bits on an oven pot, add 2 cups of the liquid*, sprinkle with chopped nuts (I have used hazelnut) (optional)
  • bake at 350F pre-heated oven for 20 min**
  • enjoy! (top with a scoop of ice cream if you wish and tell me this was not a good idea 🙂 )

*I have had around 1 liters of the liquid, which is yummy. Drink it as it is, or use less water 

**You can bake longer to thicken the liquid

Sourdough

My sourdough today was kind of sticky dough and as a result did not keep it shape well. But there was oven spring and it looks great 🙂

radish pickle with jalapenos and mis-fortune of a strawberry marmalade trial

I wanted to cheer myself up with two new recipes; radish pickle and frozen strawberry marmalade.

It turns out I bought extra packs of radish, so why not to try pickling it? An adventure for me and a chance of limiting food waste. I think it will turn out to be right.

Frozen strawberry marmalade, on the other hand, turned to the dark side right at the end. I decided I could boil the jars to help preserve them. I was wrong – the pot was not deep enough. Then, I turned them upside down to sterilize at least the neck of the jars, and one or two of the jars leaked somehow. Goodness help me…..I aborted the attempt. Sadly, these marmalade will go to garbage now. Nevertheless, I am posting the recipe here because there was a 1/4 cup of the marmalade I had in a jar that I did not attempt to water-can and it is delicious. At least I have got 1/4 cup of it!!! 🙂

Radish pickle

  • 600 gr radish; washed and diced as thinly as possible
  • 2 jalapeno pepper, washed, and diced with the seeds
  • 5 garlic, grated
  • 1tbs+1tsp sugar
  • 1tbs+1tsp salt
  • 1 cup vinegar and 3 cups water-boiled

Boil the brine (vinegar and water); add sugar and salt – mix

place the diced radish, jalapenos, grated garlic in clean jars (mine were 750 ml jars; it made 2 jars)

add 2 cups of brine or as much as the jar can take

close the lid and secure the rings. Must be ready in a week or so

*added the next day: as being a pickle person, I could not help and try this pickle the next day. To my surprise it was ready and it was hot – thanks to jalapenos. If you are looking for a quick type of pickle, this is a must to try 🙂


Frozen strawberry marmalade

  • 1.5 kg of frozen strawberry
  • 4 cups sugar
  • 1 cup water
  • 1 tsp salt
  • juice of 1.5 lemon (9 tbs)

place the strawberry on a container and mix with the sugar; wait for 1 hour util strawberry starts to release its juice, mix every once a while

add the remaining ingredients and bring to boil at medium heat (takes around 15 min)

boil for 15 min and then lower the heat to medium and boil an additional 30 min. It must reduce at the end

remove the scum and pour down the marmalade in sterilized jars (I boiled them for 15 min together with the rings. Lids were placed in hot water); leave around 1/2 inch room

clean the rims of the jars, place the lids, and secure the rings.

if you can pressure-can or water-can, you can keep these for some time. But if you are like me and cannot do this for some reason, then keep it as it is at the fridge and consume within weeks.


I hope you will be able to enjoy these recipes! 🙂


sourdough loaf with oats and black olives

Here is a fantastic sourdough with a hint of trolled oats and black olives 🙂

This loaf was my first trial of a rectangular shape 🙂 I learnt a while ago that sticky dough do not keep its shape well if does not have enough support. So I used one of my oven pots to prove and bake this loaf.

I would do this loaf again; the crust was thin and soft (the way I love it) and it tasted amazing!

The recipe is similar to others:

  • 1 1/3 cup 100% whole wheat starter (fed Friday night and then on Saturday morning prior to saving half in the fridge; used to make the dough in the afternoon)
  • 2 cups water; mixed the starter and water well with the help of a fork until it became kind of frothy
  • 2.5 tbs sugar; mixed well into the starter/water mix
  • 4.5 cups of bread flour, 1.5 tbs salt, and 200 grms of pitted black olive-halved: (approximately 1.5 cups). Formed a shaggy dough, closed the lid, kneaded every 30 min or so three times until dough looked like forming. At the end of folding stage dough was too sticky (must be the olives’ juice), so I added 1/3 cup of rolled oats to help with the moisture
  • let rest at room temperature over might
  • since it was a kind of sticky dough, I decided to place it in a large rectangular oven pot lined with parchment paper
  • sprinkled top with more oats, placed in a nylon bag, tied the ends, and proved for 4.5 hours at room temperature
  • baked in non-pre-heated oven at 350 F for one hour

my love affair with self-sufficiency

Life is interesting.

I have never been interested in cooking or being self-sufficient.

In the last two years, however, this has change. I still do not like cooking but baking, pickling, and jamming have been awesome. I could not be more excited 🙂

Fermented food

Sourdough: I first became interested in baking bread and I now even have a sourdough starter that makes wonders every week 🙂 I have not purchased any store-made bread since May 2016. I also shared my sourdough and commercial yeast loaves with my fiends. What a joy 🙂

Kefir: I then was gifted by kefir grains within 2017 and i not only fell in love with kefir itself, but I made cheese/spread from it and even used it in baking bread 🙂 Drinking kefir makes me feel good and I know that it gives me the calcium that I need at my age in addition to many nutrients. I am very happy with it 🙂

Pickles: I did pickles before thanks to my mother, but I have never been this interested in it until recently – I love the beet and cabbage pickles I make! I think it is the benefit of living in a cold climate that the pickle lasts long without going bad and this way I always have a jar or two in my kitchen. I made three batches of beet pickles this fall enjoyed by myself and my friends 🙂

Sauerkraut: And tomorrow I will try my first ever sauerkraut! 

How about this? 

I think I am moving in the right direction 🙂


Jam/marmalade:

And just within the last 5-6 weeks, I started experimenting with making jam; dried fig jam first, then orange and tangerine, and today the raspberry jam/marmalade 🙂

I feel like I am doing such a great job refraining from additives and chemicals in store-bought jams/bread/pickles. I must be rightfully proud of myself and I am!


Sewing

Okay.. I have not been as productive as I wished, but since I purchased my lovely sewing machine last year, I have done small stuff, including lots of covers for jars and discloth/cloth for the counter and window sills. I am yet to undertake a serious project, like a blouse or a quilt, but I know when the time comes, that will happen too 🙂


————————————————-

These are newfound interests for me and they have been enriching my life, providing me healthy and affordable food/items, and I feel increasingly “able”.

I really am excited about this change in me.


Squirrel GIF - Find & Share on GIPHY

——————————————–

gif by:https://giphy.com/gifs/XSKhFtfGr1HYA


raspberry marmalade


IMG_3089
look at this colour. I dare you – look at it! 🙂 doesn’t this look fantastic?

Yours truly continues to explore the world of jamming!

I wanted to try berry jam this time and found raspberries on sale the other day – how lucky I am?

Part inspired from others on the internet, part improvised, here is my frozen raspberry marmalade recipe 🙂

Ingredients

  • 1 kg frozen raspberries (around 9 cups)
  • 4 cups sugar
  • juice of one lemon (8 tbs)
  • zest of a lemon

Recipe

  • Place the raspberries on a pot, cover with sugar, give a quick mix and let stand an hour or so
  • In the meantime, clean the jars. I used the dish washer and then placed them and the rings at pre-heated oven (220F) for 15 min. I pat-dried the lids using clean paper towel and set aside
  • At the end of one hour of resting, add the zest and lemon juice and bring the mix to boil on medium heat (takes around 10 min)
  • Continue to boil for 15 min until it reduces to half (make sure to mix to prevent sticking to the bottom of the pot)
  • Pour in jars, clean the rims, place the lids, and close the rings (makes one liter of jam)
  • Water- or pressure-can if you would like to keep them for a long time (like a year), otherwise keep at the fridge and consume in 3-4 weeks
  • PS. The recipes I have seen usually calls for equal cups of raspberry and sugar – I used 50% less this time and to me it is perfect. Adjust the sugar levels as you like.

Bon appetite! 🙂


corn flour bread

I literally craved for this since yesterday 🙂

I followed the recipe here with the exception of baking at 350F for 40 min, adding 2 jalapeno peppers (de-seeded and cut), and using corn flour (fine).

My verdict is that it is an easy and delicious bread that can be readied in an hour.

It was a little bit sweet for a bread, but it was not annoying. I would maybe add some more sugar next time to make it like a cake 🙂

Jalapenos could have been lightly cooked prior to adding to the mix, but overall that was one great bake today! 🙂


Tangerine jam

My jam-making saga continues!

I tried tangerine jam this weekend – my first ever trial with this citrus fruit and the third ever jam trial (previous ones were fig and orange jams).

Ingredients

  • 12 tangerines
  • 2 cups of sugar
  • 1 tbs of salt
  • juice of 3/4 lemon (8 tbs)
  • 2.5 cups of water
  • 2.5 cups of peel (of 13 tangerine)

Recipe

  • Peel the tangerines, remove the white coat and seeds (there was no seeds in these tangerines, which is a great help) 
  • Add sugar, give a mix, and put aside for 1 .5 hours; mix every once a while
  • Immediately put the peels in a vinegar-water. At around 45 min after I added sugar to tangerines, I took them out one by one and scraped with the help of a knife. I then placed them in the vinegar water until use. Immersing them into liquid helps with swelling of the white coat. Vinegar helps with killing any microorganisms. Right before putting the jam on stove, slice the peels thinly.
  • At the end of 1.5 hours, add the remaining ingredients and bring to a “rolling boil”
  • Reduce the heat and simmer for 40 min until it is reduced. Mix through the end to make sure jam will not stick to the bottom of the pot.
  • Clean the jars, rings, and lids. I placed them (except the lids) at 220F oven for 45 min. I dried the lids on a clean piece of paper towel.
  • Pour down the jam right away in jars, clean the rims, and close the lids. Makes jam enough for 2 x 500 ml mason jar
  • Keep in the fridge and enjoy within weeks (or try water or pressure canning for a longer time period)

Bon appetite!

PS; peels give a bitter taste to jam if the sugar content is not high enough. feel free not to use them. I love rinds because of their texture giving a lovely contrast 🙂


Happy sourdough bread!

IMG_2935

Here is today’s sourdough bread with a happy, happy, happy face! 🙂

It will be gifted to a colleague of mine, who gave me a ride this weekend – hope they will like it 🙂

Dried Turkish fig jam with sesame seeds

And I present you my first ever fig jam’s recipe 🙂

One of my friends gifted me with 2-pounds of dried Turkish fig a couple of months ago – yum yum yum 🙂 I have been meaning to make jam with it and today was that day, my friends!

I have been inspired by many recipes on the internet, this one and this one particularly. I combined the general recipe of the first one (without the vanilla stuff) and the sesame seeds of the other, and voila here is my first ever dried fig jam!

Recipe

  • Wash briefly 2 pounds of dried Turkish figs (64 big sized and moist figs – one fig was eaten as per quality control(!) before the jamming process. I needed to do that, right? 🙂 )
  • Remove the stalks, boil water, and soak the figs in water for 40 min, close the lid of the container to keep the heat in
  • Strain and drain the excess water (this is a delicious liquid, which I have drank without any reservation 🙂 ) 
  • Dice thinly – around 8 diced figs make up a cup
  • Toast 1/8 cups of sesame seeds, put aside
  • Put the diced figs in a pot; add 3 cups water, 3 cups white sugar, 1 tsp salt, juice of 1.5 lemon (around 10 tbs), and the sesame seeds
  • Bring to a vigorous boil, close the lid and simmer at low heat for 12 minutes
  • Cool for 10 min with pot’s lid open (to prevent moisture from the lid going into the jam) and put in cleaned jars (wash with soap and hot water; then transfer them into an oven at 220F for 30 min – rings included, except the lids which were air dried and patted down with paper towel)
  • Pour into jars , clean the rims of the jars, close the lids and rings
  • cool down and refrigerate. I believe it is supposed to be consumed in a month or so Alternatively water or pressure can it for longer duration. Jam can also be processed in a blender for a smoother jam. You can add less or more lemon juice – this was slightly sour and it complemented the sweet taste so well 🙂
  • This jam fit into four x 500 ml mason jar
  • Bon appetite!


fast beet pickles

I have got a great recipe from my mom which I am happy to share.

1. Peel the beets (I do that – many people boil beets in their skin, but I do remove them so that I can use the beet-water later) and chop

2. Put beet bits in  boiling water and boil for 15-25 min. I like my pickles kind of crisp and not mushy; but you can adjust the boiling time as short or long as you please

3. Put the beets in jars that are clean and sterilized (I wash them in the dish washer and let the steam work on them. This time I also kept them at oven heated up to 212F (100C)  for 20 min. I treated the rings the same. As per the lids, I only washed them in the dishwasher and then dried with paper towel)

4. Close the lids but do not tighten yet; let cool the beet-water

5. Brine: per 750 ml jar; peel and grate 3 mid-size garlic; add vinegar+beet water (1 in 4 ratio), 2 tbs of sugar and 1 tbs of salt. Mix well

6. Pour down the brine over the beets (around 1 1/3 cup brine/each jar), make sure it covers them. Close tightly and preserve the jars in the fridge or a cool place (mine are always on the kitchen counter; we have a cool climate and my kitchen is heated up to around 17C).

7. These pickles can be enjoyed immediately. Consume within a short time (2-4 weeks).


TIPS:

  1. You know beets will create a mess and you will clean and clean and clean, right? So, be careful and gentle while handling it 🙂 I placed a number of towels around to make sure the mess will be contained, yet sill needed to clean my wall. Oh, well. I may be just clumsy (and I am) 🙂
  2. You can increase the ratio of vinegar to water and reduce the sugar; this will help with keeping the pickle longer. I personally love this ratio; it does not smell like vinegar and tastes sweet. Just the way I love it 🙂
  3. Since this pickle is not sterilized like in water baths or pressure canners etc, it is best consumed soon (like within a month). Always keep in the fridge to protect it from getting spoiled. Use sterilized tools and cans to reduce the chance of spoilage.
  4. I found the long beets rather than round ones make better pickles; I think it is easier to cut them and have decent sized bites.
  5. Use fresh beets – cannot believe what a difference it makes! One of my colleagues had brought me a bunch from her farm and the pickle I have made using these beets were the best. I purchased today’s beets from farmers market. Crunchy beets they were – the best 🙂


bread with sun flower seeds

While trying to revive my dried sourdough starter, here is the bread I have baked using the commercial yeast.


Recipe:

1/2 tbs yeast, 1 cup 2% milk, 1 cup water (warm milk and water together first), 2 tbs sugar; mix well and activate the yeast for 10 min (cover the bowl)

add 3 tbs salt, 9 cups of bread flour, mix and form a dough

cover and stretch and fold 3-4 times (around 20-30 min rest in between)

rest at fridge over night

in the morning. take the dough out and bring to room temp ~3 hours

shape the dough and rest 5 min

work on the shape of the dough, and place it in a bowl with clean cloth and sprinkled with generous amount of sun flower seeds

put in a large plastic bag and prove at room temp for 4 hours (in the last 30 min I put it in an oven warmed to 100F)

score and bake at a non-pre-heated oven at 375F for 45 min (oven on) and an additional 15 min (oven off)

take out, sprinkle some water over the loaf, and let cool down

Bon appetite!


PS: since  this loaf is going to a friend of mine, I did not cut it out and hence I have no idea how the crumb is. But the oven spring was amazing and the fact that the loaf kept its round shape, I am hopeful that the crumb too is good 🙂

The Queen of all bread; sourdough with kefir

IMG_1382
but…but… but… can you see what I see? Is that not GORGEOUS!? 🙂 🙂

I am hooked to this combination and I suspect that I will always bake sourdough with kefir from now on.

I have not tasted anything quite like this, nor eaten a softer sourdough that I have baked. The slight salty taste, the crumb (the best so far), and the smell of this sourdough will fill my dreams – I can tell you that with confidence.

The recipe is quite basic like any other sourdough I have baked;

1. I added to 1 cup of whole wheat starter fed twice (Friday night and Saturday morning), 2tbs of sugar and 1 cup of kefir – mixed well with a spoon until it become somehow frothy (it does become frothy quite easily). Then added 2 cups of bread flour and 1.5 tbs of salt. Mixed and formed a shaggy dough.

This dough formed quite fast without needing to mix too much – I give it to kefir.       Somehow it helped bond the dough and voila! I had that healthy looking and soft             dough. As it was my practice the last few weeks, I made sure the dough was slightly           sticky while adding the flour.

2. I then left it at room temperature covered with a clean towel and stretched and folded 4-5 times time to time. The next day, I shaped it, and left for proving in a bowl covered with a clean cloth and sprinkled with generous amount of sesame and poppy seeds. It proved for 6.5 hours at room temperature in a plastic bag.

3. I baked it in non-preheated oven; 375 F for 15 min first, then 25 min at 350 F (the seeds burn pretty quick if the temperature is high), and then left in a turned off oven for an additional 5 min.

Give it a try and let me know whether you also agree that this is the best sourdough ever! 🙂


IMG_1360
mother of sourdough – the happy and active starter
IMG_1362
kefir – I am hesitant to add it but I read that others tried baking bread with kefir, so here comes a fresh batch of kefir
IMG_1363
the initial shaggy dough – do not worry – it will form just fine
IMG_1365
at the end of stretch and folds; ready to rest overnight
IMG_1367
and the next morning it has risen all nice and fluffy 🙂
IMG_1369
shaped and left for proving
IMG_1371
6.5 hours later, it seems to have proven quite a bit – exciting 🙂
IMG_1373
the seeds look great! sadly I also deflated it a little bit while taking it from the bowl onto the parchment paper.. feeling nervous….
IMG_1375
i deflated the dough a little bit more while scoring…. not my best day – next time I will have to handle this dough with a little bit more care
IMG_1382
but…but… but… can you see what I see? Is that not GORGEOUS!? 🙂 🙂
IMG_1401
and the crumb is my finest so far – kefir and sourdough have formed a great collaboration. This bread will be a classic at my house from now on

sourdough bread with beet

Here we go – the most interesting sourdough loaf I have ever baked!

What do you think?

I had seen a recipe here at wordpress once upon a time using beet (thanks whoever had posted it at that time). It always intrigued me and finally this weekend it was the time to give it a try.

My verdict; this is a very easy loaf to work with because wild yeast loves the beet (or anything else like carrots that provide some kind of nutrients and moisture to the dough/bread) and the colour is just amazing! It was a fluffy dough that rose pretty well. The proving step was also short (~5 hours at room temperature in my cool Canadian kitchen) – partly because of the hydration by the beet and partly because I tried to make it kind of sticky with less flour than usual. The crumb is open (one of the best, if not the best crumb I have seen lately) and it is soft and palatable. The only thing was that the smell of raw/baked beet somehow threw me away at the beginning. But the remedy is easy and available – butter, as usual, makes it perfect! 🙂

This being said, I think next time I will try it with raspberry and some more sugar!


Recipe

Friday night: took the starter off the fridge and fed with whole wheat flour and water, wrapped in a towel and left at room temperature overnight

Saturday morning: fed the starter again and one hour later divided it into two portion: one portion went to fridge (starter) and the second portion left at room temp for 3 hours to flourish (to be used in the dough)

Saturday afternoon: added to 1 cup of starter, 2 tbs of sugar, and 1 cup of water. Grated 1 medium sized beet and added to the mixture. Then, added 2.5 cups of bread flour and 1.5 tbs of salt and mixed with a spoon. It formed a shaggy dough. After that I left for shopping, so only 5 hours later or so, I stretched and folded it once or twice before leaving it to rise at room temperature overnight (closed lid and covered with a towel)

Sunday morning: shaped on a generously floured work surface, let rest for 10 min and shaped again. I decided it was better if I proved it in an oven dish and directly baked it after proving. Hence, I placed the dough in the dish covered with parchment paper and put it in a nylon bag – that, I found a while ago, creates a green house effect and help dough prove faster

Sunday afternoon: After 5 hours of proving, turned the oven on (375F) and placed the dough in it. Baked for 45 min with oven on and then an additional 15 min with oven turned off.

Do not forget to cool down, admire, and enjoy it with butter and loved ones!  

Bon appetite 🙂


verdict on quinoa as salad filler/base

img_0561

Quinoa is something that I wanted to try for some time – many people talk very positively about this staple. As someone who likes legumes/beans/dry food as salad material I thought it was time that I bought a pound or two and give it a try. Luckily, it did happen this weekend when at a bulk produce store I managed to find organic quinoa (not that I am particularly interested in organic food – it just happened to be so. Anyways..). 

Recipe: 

boil and bake 1.5 cups of quinoa in 3 cups of water for around 20 min (stir frequently), add 2 tbs of chili sauce, a pinch of salt and chili pepper, juice of 1/2 lemon, 6 small radish, 1/2 cup of shredded lettuce, 3 stalks of celery, 1 bunch of fresh coriander, 1.5 small onion, and liberal amount of olive oil.

Verdict:

Quinoa does not have a strong taste, smell, or aroma. So it serves very well as a base/filler for salad. However, it did not appeal me and I could certainly live without it. (These being said, I think considering its protein content, I would give it a try every once a while.)

Also, I think fine bulghur (cracked wheat) makes a better base for this kind of salad (simply boil water, pour it over bulghur, cover the lid, wait for 10 min, and mix with a fork/spoon, and then add the other salad items).  C’est Simple! 🙂

Plus, I wonder whether the price would worth it (i bought around 500grs of organic quinoa for 4.5 bucks). I am pretty sure that its being organic inflated the price this time, but I am certain that I could get bulghur much cheaper.

If you like it, I hope you will continue to enjoy it for many years to come. Me, on the other hand, will stick with bulghur 🙂


sourdough loaf with part semolina flour

img_0293

This is my second time adding semolina flour into sourdough.

This time something really worked; this was the best rise I have ever seen with my starter 🙂

Not sure whether I have a starter that evolved and works robustly at our cold climate (rises even at ~17C, which is the temperature of my kitchen) or it was the semolina flour that kicked the dough a little bit, I am not sure. But whatever it was, this recipe is something that I sure will try again in the future 🙂


Recipe

1.5 cup of starter that is fed with 2/3 cups of whole wheat flour and 1/3 cup of water a night before and again in the morning

Add to the starter 1 tbs of salt, 2 tbs of sugar, 2 cups of bread flour, 1 cup of semolina flour, and 1 cup water. Mix well and knead 4-5 minutes

Cover and let rise at room temperature, with occasional stretch and fold (I did a total of 5 of these)

Let rise at room temperature over night

The next day, shape the loaves (I tried one baton and one whirled loaf; the latter one did not turn out to be great-looking, but you can try to shape your loaves as you wish. I floured a large piece of parchment paper and placed the loaves on it on a cookie sheet). Place in a big plastic bag and let proof at room temperature for 2 hours

After proofing, heat the oven to 375 F and bake the loaves for 45 – 50 min

Sprinkle with a minute amount of water, cool for 5-10 min, and enjoy 🙂


carrot sourdough loaf

img_0230

I am excited to write this recipe 🙂

It gives a strong, slightly sticky dough that forms a great crust and very soft crumb (the softest I have seen in a sourdough). The carrots, I believe, help with the moist crumb and with a fairly good rise. I also believe that yeast loves the carrot (or carrot juice coming out of the grated pieces). In anyway, I suggest you give this loaf a try and see how you like it 🙂

—————————————

Recipe:

1. Grate 4 mid-size carrots

2. Add 1.5 cups of sourdough levain to carrots (I fed 2/3 cups fridge-stored starter with 2/3 cups of whole wheat flour and 1/3 cup+1 tbs water and let rest over-night at room temperature. In the morning it was risen and bubbly. I fed it again two hours before I prepared the dough)

3. Add 1 cup water, 4 cups bread flour, and 1.5 tbs salt. Mix by hand or using utensils.

4. Leave at room temperature (covered) to rise: I had a social to attend, so left it for 4 hours and stretched and folded it twice in between.

5. Place in the fridge over-night

6. The next morning, take it out and rest at room temperature for around 1 hour

7. Shape the dough (I formed a baton today), cover with kitchen towel, and let rise for 1.5 hours

8. The last 20 min; pre-heat the oven and the roaster (if you are using one) to 375 F. Flip the loaf upside down on parchment paper

9. Score the surface, and bake in the roaster; 35 min closed lid and 25 min open lid. Turn off the oven and leave the loaf in the roaster/oven for an additional 1 hour (since this is a moist loaf, I found that this step helps with baking inside the loaf)

Enjoy 🙂

spicy tofu and sour green beans

img_0235

I had heard somewhere about the spicy tofu and decided to give it a try today. It was well worth it; tofu had not ony a great texture but also a nutty falour. I improvised the sour green beans (sour because of the vinegar) and I am glad I have – they were interesting and surprisingly tasty 🙂

Enjoy!

——————————————

Recipe:

  1. slice up firm tofu (I used around 1 cup for this dish)
  2. coat them with the spice mix consisting of 1 part chili powder, 1 part turmeric, 1/5 part dry dill, and salt to taste
  3. fry both sides for 2-3 minutes in vegetable oil; set aside
  4. coarsely slice 1/2 onion and fry for 1-2 minutes in vegetable oil
  5. add 300 grms of green beans and add 1/2 cup of water – simmer for 5-10 min
  6. add 1/3 cup of vinegar and salt, simmer for an additional 2-3 min

Serve immediately

my finest sourdough loaf

img_0050
does it not look awesome? 🙂

This is my finest sourdough so far. I could not be more excited 🙂

For many, the amount of levain in the recipe may be too much, but it just worked wonders for this loaf. I added this much this time because I had extra starter that I did not want to waste.

I reduced the oven temperature to 375 F this time as I am a little bit annoyed by the 400 F (too high; not sure what happens to the roaster at such high temps).

The dough was a little bit sticky but not runny and there was a very nice oven spring, which always pleases me; it is magical 🙂

I note that while the majority of the flour is white flour, the colour and the texture of the whole wheat (from the starter) is quite dominant.

This was the softest sourdough I have ever baked and the crispy crust was surprising and very welcome 🙂

——————————–

Levain: 3/4 cup of Monster sourdough starter, 3/4 cup of whole wheat flour, 1/2 cup water. Mix well and place in a clean glass jar. Left at room temperature over night. The levain should have risen ( around 2x), smelling a little bit sour, and bubbling the next day.

Sourdough loaf:

Add to the levain (around 1 1/3 cup), 3/4+2 cups bread flour, and 1 cup water. Mix well with hand or a spoon. Leave at room temperature covered with a lid and stretch and fold 4 times every 30 min. Leave at room temperature for an hour and then place in the fridge for the night

In the morning take the dough out and let rest at room temperature for 5 hours or so. It should slightly rise

Add 1 1/2 tbs of salt and gently knead and shape (I tried a baton this time). Place on a parchment paper and let rise for 1 1/2 hours at room temperature

Pre-heat the oven with a roaster (or dutch oven if you have one) at 375 F.

10 min before putting the loaf in, place another sheet of parchment paper on top and flip the loaf (I do that because I think it helps with the air packets to occur on both top and bottom of the loaf.. any ideas anyone?)

Place the loaf in the heated roaster and bake for 30 min with closed lid and then another 20 min with open lid.

Enjoy 🙂

today’s bread

img_9878

I changed my mind and rather than making a sourdough for tomorrow, I decided to sacrifice (!) my early-levain to bake some fresh bread today, also containing commercial yeast.

My first time trying small loaves, which turned out to be pretty good. I think I will try this in the future. The small loaves are softer and easier to manage, and they delighted me with their individual characters 🙂

This is also my first time mixing the commercial yeast and wild yeast in a dough. I suspect that the wild yeast was not at good levels as expected; I had only fed my starter and aliquoted my levain a few hours before I decided to bake this bread. The taste of the loaf did not give a hint of sourdough.


Recipe:

1. Add 1.5 cups of warm milk (1%), 1 tbs of sugar, and 1 tbs of dry active yeast; mix well, cover with a kitchen towel, and rest for 10 min to activate

2. Add 3.5 cups of bread flour, 1 cup of sourdough levain, and 1 tbs of salt, and mix and knead for one-two minutes.

3. Place in a new pot/bowl smeared with vegetable oil, cover, and let rise for 20 min. At the end of the 20 min, stretch and fold 4-5 times, cover, and rise. I repeated this for 5 times today.

4. Cut portions of dough, shape with your hands (I did not use flour or a counter top for this purpose), and place the loafs on parchment paper on a cookie sheet. Put stretch film over the loaves (to prevent dehydration), place the cookie sheet in a large plastic bag, and proof for 1 hour at room temperature

5. Pre-heat the oven at 375 F. Sprinkle sesame seeds on top of the loaves, and bake for 30-35 min


bread with green olives and poppy seeds


img_9855
excuse the shape 🙂 I was in hurry

Another lazy chef edition 🙂

It does not take much time; so if you are in need of carbs 🙂 give this a try. Also, the poppy seed and olives can be replaced by anything you desire.

—————————————————–

Recipe:

2 cups all purpose flour

1 cup 1% milk

1 tbs of baking powder

1 tbs sugar

1/2 tbs baking soda

2 tbs poppy seeds

3/4 cups of green olives, cut, washed, and drained


  • Mix all ingredients and form a round ball
  • Score the surface
  • Bake at pre-heated oven (375 F) for 20 min with a cover and an additional 20 without it
  • Enjoy 🙂

cauliflower dish

img_9826

Absolutely one of my favorites dishes:)

I was inspired by a recipe by my sister, which I modified for a healthier version. My sister’s recipe calls for frying the cauliflower covered with the batter. I instead opt for slightly boiling them on stove and then baking with the egg-flour-olive oil-water batter in the oven. I love fried version as well – give it a try if you wish)


Recipe:

  • Wash a head of cauliflower and cut florets
  • Boil for 5-6 min; it should not be too mushy. Then drain
  • Mix 3 eggs, 2 tbs of olive oil (or vegetable oil), 3 tbs of flour, 1 tbs of salt and 1/2 cup water
  • Pour the mixture on the florets and make sure they are covered all over
  • Bake at 350F for 45 min
  • Serve with chili pepper flakes, yogurt (add 1-2 cloves of garlic, minced, for a lovely kick) and greens of your choice (I have coarsely chopped parsley in the photo)

banana and hazelnut loaf

img_9753

While I love observing yeast and dough rise, collapse, and form bread, sometimes I am in love with the baking powder, too.

Why?

Because it gives quick results, like tea biscuits or fruit/nut loafs. After all, I am a lazy chef 🙂

I tried hazelnut and banana loaf today; totally improvised and totally worth it 🙂

——————–

Ingredients:

  • 1/2 cup hazelnut (dried and not crushed; you can replace it with walnut or other nuts/seeds)
  • 2 banana; thinly sliced
  • 1/2 cup sugar
  • 1 egg
  • 1 tbs baking powder
  • 1/4 cup butter; cut in small pieces
  • 1 tsp cinnamon
  • 1 tsp salt (optional; I kind of like the contrast sugar and salt make)
  • 1 cup 1% milk
  • 1 cup all purpose flour


Procedure:

  • Add sugar, banana, cinnamon, hazelnut, and salt in a bowl
  • In a separate bowl, whisk an egg; add the milk, butter, and flour and form a batter by mixing
  • Mix all together and pour in an oven dish brushed with vegetable oil
  • Bake at 375 F for 35 min
  • Do not forget to enjoy 🙂

parchment paper disaster and a wonderful loaf

img_9726
this is the second loaf, which was baked in the roaster and thus did not get affected by the parchment paper disaster….

Today I learnt that the smoke detectors in my kitchen work just fine because I burnt the parchment paper in the oven!!!!

Never though that would happen. I recently started using it, always in a roaster without any problem; this was the first time I tried it on a cookie sheet.

I had placed the cookie sheet lined with the parchment paper + loaf on the lower shelf of the oven; is that the reason I wonder (oven was at 400 F – many people say that parchment paper is safe to use at this temperature)…

Anyways; a lovely loaf is gone to garbage (the one on top of the burnt paper); luckily I have had another loaf baking in the roaster at the same time, which turned out to be just great 🙂

This loaf is the same as last time where I used milk rather than water in the dough. This time I also increased the amount of yeast, sugar and salt (2 tbs of each for 4 cups of flour), and baked 15 min at 400 F (until I realized parchment was burning…); took out while still in the roaster for 10-15 min until I cleared the oven from smoke; and then baked it at 350 F for an additional 15 min (lid open).

I think I have reached consistency in terms of baking a soft and beautiful loaf, which also happens to have excellent oven spring. I would recommend this recipe to everyone, especially those that are new to baking bread; it is much easier and more forgiving than the bread prepared with water (which I could never bake well) 🙂


can dough be forgiving?

IMG_9697.JPG
milky bread – is it not gorgeous? 🙂

I have been experimenting with bread making for some time and I can say I am still on the way to reach a perfect loaf.

For some reason I am not interested in following a recipe and I rather improvise. While this is exciting (each dough and bread feels like an “experiment”), the end results are usually not great.

This week I tried two loafs; one sourdough and one loaf with milk and commercial yeast.

The sourdough was miserable and did not forgive being poked, adding too much flour and then too much water. The dough was the weirdest I have ever made and I guess I should pay more attention to it 🙂

This being said, the loaf with the milk turned out to be the best ever! The oven spring was obvious, it was soft and incredibly tasty. Next time I should be using a little bit more yeast to make it really fluffy and with large air pockets 🙂

Milky bread recipe:

Add 1 cup warm skim milk, 3/4 tbs sugar, 3/4 tbs dry yeast. Mix well, cover with a kitchen towel, and rest for 10 min until the yeast forms the foams on top

Add 2.5 cups of bread flour, 3/4 tbs salt and mix with hands and knead for 4-5 min

Place in a container brushed with vegetable oil, flip the dough to make sure it gets oil all over

Let rest at room temperature 30 min and then and stretch and fold (total of 3 times; 30 min apart)

*I am not good at kneading, or at stretching and folding. So this time I tried to do a little bit of both of them to see whether I could get a nice, well formed dough

Rest in the fridge over-night – it should get fluffy and risen a little bit

In the morning, take it out to room temperature and let rest for 3.5 hours (only because my kitchen was cold today and I had to go out to shop. In a warmer environment, this time could be much shorter)

Gently de-gas, shape, and let proof for 1.5 hours

Score the surface, place in a pre-heated roaster, and bake at 400 F (oven is pre-heated too)

Enjoy 🙂


IMG_9675
this is my sourdough (50% whole wheat and 50% bread flour) 😦 just a little bit better than a brick 😦


collard greens and potato pastry

An easy, tasty dish that is sure to warm the stomach 🙂

I prepared the dough myself, but if you wish, you can rather use pastry sheet.


Dough: 

Add 1/2 cup and 1 tbs of warm skim milk, 0.5 tbs of sugar, and 0.5 tbs of dry yeast. Mix well, cover, and let rest for 10 min

Add 1 1/4 cup of all purpose flour, 0.5 tbs of salt, and knead for 2-3 min

Place in a warm place covered for 1 hr 15 min

Divide the dough into two and roll in rectangular shapes


Filling:

Skin and cut two mid size potato and boil for 3 min (do not over-boil)

Chop 1 mid size onion and lightly brown in 1 tbs of vegetable oil

Add 1 tbs of chili or tomato paste

Add 1 bunch of collard greens, washed and cut, stir for 2-3 min

Add the potatoes and simmer for 4-5 min until all the liquid evaporates

Add salt and crushed chili pepper to taste

Pour down the filling on top of the first pastry sheet and cover with the second

Whisk one egg and brush over, sprinkle with sesame seeds and nigella seeds

Bake at pre-heated oven (375 F) for 35 min or until the top browns

Enjoy 🙂


green pepper and cheese puff

Here is an easy recipe,  especially for lazy chefs like myself 🙂

Succulent and soft inside. Green pepper made a great contrast with the soft texture of the dough. Try with spinach, zucchini, or other veggies.

Enjoy 🙂


Ingredients:

1 1/2 cup all purpose flour

1 cup skim milk

3 green peppers, thinly sliced

150 grms of cheese (I used Monterey Jack), grated

1/4 cup of salted butter, cut in small pieces

1 tbs of baking powder

1/2 tbs of salt

1/2 tbs of sugar


  1. Mix all ingredients in a bowl – do not over-mix (to help the baking powder do its job)
  2. Grease an oven pan (or place a piece of parchment paper in it)
  3. Pour down the mix in the dish
  4. Bake at pre-heated oven (400 F) for 35-40 min


quiche with spinach and mushroom

IMG_9353.JPG

I have been meaning to try this quiche recipe for sometime. Finally, that day arrived 🙂

I have had some modifications:

  1. added 5 tb of chilled water to the dough rather than 4 tb
  2. used 1 cup of chopped mild cheddar as the only cheese source. And since I was kind of lazy, rather than grating it, I cut it out 🙂
  3. added 1 tsp of baking powder to the dough
  4. added chili pepper to the spinach-mushroom mixture. Also added it on top 🙂
  5. rested the dough for 1 hour at the fridge (I was buy with something else at that time) rather than 30 min
  6. used raw spinach (not frozen); first applied salt (around 1/2 tb) on it and mushed well, rinsed well, and squeezed hard to drain off water.  Then, I added it to the mushroom-garlic mix on the stove.
  7. Overall, I cooked the mix longer (around 10 min for the mushroom first and then added the spinach and cooked for another 10 min)

Yummy 🙂 very hearty and high calorie meal. I could not eat more than 1/4 of it at once. Ensured to feed 4 people.

IMG_9329

IMG_9330

IMG_9335


IMG_9353

IMG_9358


Added after the post: Next time, I would make some modifications to this recipe. First, I would have the dough a little bit more hydrated and perhaps add another 1-2 tbs of water. Also, I would remove all the liquid from the filling (mushroom – spinach) and reduce the milk to may be 3/4 cups. The egg mixture would benefit from more vegetable oil. I think the dough could have been thicker or the filling would have been thinner.

lemon – raisin teabiscuit

IMG_9290

Well… when it is boring, one thing that comes to my mind is food 🙂

I wanted something sweet, so decided to improvise tea biscuit. Tea biscuits are easy to make and bake. Thus, when the time is short, they are my favorite.

Since it is boring to repeat the same recipe and exciting to try something new, I improvised a recipe based on a previous one with some changes/additions.


Preparation time: 10 min

Bake time: 35 min


Recipe:

2 cups of all purpose flour

3/4 cups of raisins

1/2 cup white sugar

1 teaspoon of salt

1 tablespoon of baking powder

100 grm unsalted butter (melted)

1 teaspoon of cinnamon

1/2 cup yogurt

3/4 cups of skim milk

zest of a lemon + around 1 tablespoon of lemon juice


1. Mix all ingredients (except zest of 1/2 lemon) with the help of a spoon

2. Brush inside of an oven pot with vegetable oil and pour the mixture in

3. Sprinkle top with the zest of the remaining 1/2 lemon

4. Bake at a pre-heated oven at 400 F for 30-35 min, or until the top starts to brown


*you may shape the biscuits if you wish; I was rather in hurry so rather baked without shaping.

**for a more tangy version, add the juice of 1/2 of lemon

***for another version, sprinkle the top with crushed nuts

Enjoy! 🙂

IMG_9287
right before putting in the oven – looks pretty shaggy 🙂
IMG_9294
soft and juicy inside, chewy outside – excellent companion for a nice cup of tea 🙂


easy red cabbage stir fry

I love red cabbage in salad. My regular stores do not have it all the time, so when I find it, I buy multiple heads. Unfortunately that also means that sometime I have them in the fridge for too long and almost gone bad.

Today I decided to make use of two heads of red cabbage before they get bad. With one of them I am trying red cabbage sauerkraut (maybe I will post it another time). I made an easy stir-fry with the other one.

here is the recipe for this easy stir-fry:

  1. remove the outer layers, wash-pat dry, and cut one small head of red cabbage
  2. in a frying pot, add 1.5 table spoon of vegetable oil, let heat up a little bit (add and fry garlic for a minute or so, if you wish – I just did not feel like eating it today)
  3. add the cabbage and mix time to time for 10-15 min
  4. add 2 table spoon of soya sauce and 2 table spoons of black bean sauce
  5. stir for another 2 minutes
  6. add sesame seeds and take off the stove

Enjoy!

Is there an easier way to consume this delicious and healthy veggie?

IMG_8626
final product 🙂

“golden” beef empanada

Today’s baking adventure is beef empanadas 🙂

I called it “golden” because of the turmeric in the dough, which turned it into a perfect golden pastry.

IMG_8535
“golden”, spicy, and delicious 🙂 the colour is mostly because of the generous amount of turmeric I added to the dough.


Highly recommended if you like puffy and soft dough with a hearty filling and a kick of spices. By the way, this dough was one of the softest I ever made. I kind of thinking if I had added milk instead of water, it could have been way softer. I like this idea 🙂

———————————————————————-

Recipe (1 dessert spoon = 0.8 table spoon)

Dough

  1. chill a cup of water in fridge for 30 min
  2. add 3 cups of all purpose flour, 2 table spoon of baking powder, 1 dessert spoon of sugar, 1 dessert spoon of salt (or less depending on how you like salt), 2 dessert spoon of turmeric, and 1 cup of finely cut unsalted butter. Mix well until the butter pieces form small crumbles.
  3. whisk one egg and add to the flour. Add 1 cup of chilled water and form a dough.
  4. cut the dough in small pieces and round up, cover with cling film, and rest in the fridge for 45 min
IMG_8515
I made 4 small dough today. You can see that I am not interested in kneading, yet this recipe does not require a fine dough anyhow (in my opinion). So if you are like me, go ahead and make the dough without much of kneading 🙂


Filling

  1. add 2 table spoon of vegetable oil in a pot. Add 2 small onions and 4 garlic (finely chopped). Fry till onions become translucent.
  2. add 1 pound of lean beef and cook till it no longer pink.
  3. add 2 hot peppers (or more) washed and de-seeded
  4. add 1 table spoon of tomato paste, 1 pinch of salt, 1 pinch of black pepper, 1 pinch of oregano, 1 dessert spoon of turmeric, 1 table spoon of paprika, 1 dessert spoon of cumin, and 1 cup of water. Simmer at medium heat for 30-40 min till all liquid evaporates.
  5. Add two hard-boiled eggs, finely chopped, mix well and put aside.
IMG_8517
garlic and onion 🙂 yum, yum, yum 🙂 next time I will use less garlic as it was at one point all I could smell when I opened the oven to take the empanadas out.
IMG_8518
pepper 🙂 Thus one was hot, which I love. i can use more next time
IMG_8521
after 40 min of simmering, this is how the filling looked. It smelled really good and tasted quite spicy. Excellent treat for winter I would say 🙂
IMG_8522
After simmering and adding the hard-boiled eggs. This is the first time I ever tried adding hard-boiled egg into beef, but it seems to be working fine.


Shaping, filling, and baking

  1. On a clean and floured surface, knead the dough for a short time. Then extend the dough using a rolling pin until it reaches the desired thickness.
  2. Cut out the dough using a bowl – set aside. Knead the left-over dough and cut them in a similar way (instead of circle dough pieces, I ended up having triangles at the end, which are more practical if you do not want to waste the dough)
  3. Drain the filling. This IS important – any extra liquid will sure mess the empanadas (I experienced this first-hand today). Put 1-2 table spoon of filling on dough, apply a small amount of water around the dough and fold it over itself. You can also use fork to press on the seams to make sure dough will stick.
  4. Whisk one egg and brush over the empanadas.
  5. Bake at 400 F for 20 min on a cookie sheet.

Enjoy 🙂


lentil and celery with eggs

Looking for a way to consume left-over veggies or legumes?

Improvise and make up a meal with eggs – eggs make everything delicious 🙂

I love eggs. I know there is a controversy around consuming eggs and risen cholesterol levels – make your own judgement or listen to your doctor (re; eggs).

As part of my “no food waste” policy, I was looking for a way to use whatever I have in my fridge and my pantry and I decided to come up with an oven dish involving green and red lentils, eggs, and celery.

It turned out to be delicious if you like this kind of food combinations. The celery gave a nice crunchy kick and lentils/bread crumbs formed a soft base. Egg, of course, was the glue that held everything together. It also gave a nice taste to this dish.

If the liquid is drained well, it can also be turned into a “patty”, which can be fried or baked in the oven. I love patties yet today I wanted to see whether I can come up with something less greasy and more healthy.

For variety, replace the celery with fresh herbs.

————————————————-

Recipe

  1. wash 1/2 cup green lentil and 1 cup red lentil under cold water (the amounts are different only because I have had more red lentils and no more green lentil)
IMG_8479
here they are; the lentils nicely bubbling 🙂


2. add 3 cups of water and boil until they become soft and fluffy. Let rest and cool down 15 min

3. add bread crumbs or flour to have a consistent mix. If the liquid is more than 2/3 cup, you can strain the lentils a little bit and directly work on them without needing flour or the crumbs

4. wash and slice 5 sticks of celery and add to lentils. Add salt and a pinch of black pepper

IMG_8480
crunch and chewy – you gotta love celery 🙂


IMG_8481
this is the mix of lentils, celery, and bread crumbs. Eggs to be added now 🙂


5. add 3 eggs and mix well.

6. Place everything in an oven dish. Spread vegetable oil on the surface and bake at 350F for 50 min

IMG_8482

IMG_8485
a hearty and healthy meal with left-over veggies, legumes, and eggs 🙂

Bon appetite! 🙂


volcano soda bread with cheddar and parsley

My love for bread-making is continuing 🙂

I was excited the whole week about my next bread trial. I wanted to give the soda bread a try this time. This recipe does not require yeast or wait-times for rising; so if you are looking for a yummy breakfast bread, I would highly recommend this one or any other soda bread.

After the success of the cheddar+parsley combination I tried earlier, I decided to improvise a soda bread with these ingredients. It ended up being quite delicious and softer than I thought it would be. The cheese when melted and together with parsley gave a yummy taste to this soda bread.

Here it is 🙂

————————————————————–

Recipe:

Ingredients:

  • 2 cups of purpose enriched flour
  • 1 cup milk
  • 90 gr mild cheddar, grated
  • 1/4 bunch parsley, coarsely chopped
  • 1 dessert spoon baking soda
  • 1/2 dessert spoon baking powder
  • 1/2 dessert spoon salt (*use much less as the cheese is salty)
  1. Mix everything in a bowl – it will form a rough dough, which is fine
  2. Form a round dough and let it rest for 3-5 minutes
  3. Oil an oven dish and place the dough in
  4. Brush the surface with milk and make a X cut. (**they recommend it to be a little bit deep to help inside to bake well. Unfortunately, I made the cut too deep which caused its wide-open shape – so is the name “volcanic”. )
  5. Bake in a pre-heated oven (375 F) for 30 min
  6. After I took it out, I sprinkled water on top to provide some moisture

bon appetite!


my baking adventures and excitement in life

I have written a couple of days ago; excitement is a lovely thing 🙂

I have been thinking since then that that is actually very true and I seem to like excitement (planning, thinking, reading or writing about future plans, whether it is my budget and savings, or currently, my baking adventures).

I like this kind of excitement because honestly I am too stressed to enjoy my life. My mood is pretty much dependent on how the work goes and what hurdles we face. This gotta change and I gotta find a balance in my life between work-related emotions and life-related emotions. Eventually I am hoping that they will balance and when one of them sinks, the other can still keep my mood at a healthy level. That is why it is important for me to find things that will excite me. Who knows what it will be next day, but nowadays it is baking. I

I am planning to bake yet another bread tomorrow with baking powder based on a recipe I found on the net. I hope that this time I can do this as I really am not interested in buying another store-baked bread.

While at the beginning of my baking saga, I was only interested in yeast and how it works, I later got determined to bake my own bread all the time, dwelled into other recipes (such as tea biscuits), and now I can see that I am actually getting interested in dishes where oven is involved.

Not sure why that is but I am kind of thinking;

First, my subconscious mind. For years I have been saying “I cannot cook. I do not like cooking.”. Now the term is different (baking) and I believe that is why I am not negatively reacting to it and I in fact am okay with preparing food by baking.

Second, the availability of all kinds of recipes on the internet makes it easy and convenient to select and try dishes/bread.

Third, I am really in love with yeast and how it works, even though I have failed brutally once I was trying to bake bread/baguette. Baking powder is also interesting for me – improvising with these two is an interesting adventure, with lots of learning and all.

Fourth, baking enables me. I can bake for myself and I can bake for others. This morning for example, instead of buying something to eat with my coffee, I opted to bring in my own biscuit and enjoy it with my coffee at the cafe. Yesterday, I baked for a social. These are new abilities in me and I like this feeling.

Fifty, there is an excitement in planning to bake, choose a recipe to try, shop for ingredients, and actually try it. Considering the fact that baking does not require anything expensive and can be done at the comfort of my home, I am extra excited.

Sixth, I am eating better. Well, maybe not the tea biscuits 🙂 but the bread I made and the zucchini dish I tried today are healthier than what I would otherwise eat. I will never try those store made breads full of who knows what. Less chemicals to consume and more confidence in what I am eating. And any veggie that stays in my fridge while relentlessly waiting me to cook, can now be included in an oven dish or a veggie bread. I can trick myself eating more veggies by baking – I am excited about this.

Seventh, making use of what I have and not wasting food/veggies.

Do I have to say more?

🙂

I wish you to have such excitements in your life that make you healthier, happier, learning, and excited about life.

“soft” meatball recipe

I enjoy meatball every once a while; either fried or cooked together with veggies as meal. There is also a meatball soup recipe that I will share later.

The fact that I am a lazy cook and do not enjoy cooking much, it is not surprising for me to end up with food that are okay but not necessarily tasty.

I have learnt a trick or two from my mom last summer. She provided the recipe and made me try it myself while she supervised me throughout the process. I must say the meatballs I have prepared, even though it was her recipe and she was there when I made them, did not turn out to be like hers :(. But I thought I would share it with you in case you would like to try them yourself.

I called them “soft” meatballs as they are softer than what I used to do. The trick is adding a generous amount of bread to the meatball mix.

here is my soft meatball recipe, not necessarily my mom’s (hers is something a lot better that I cannot possibly demonstrate 🙂 ). Moms rock!

For a pound of minced beef (medium is better as it contains some fat and preserves the smell and taste better. But if you are like me, you will opt for lean or extra lean minced beef, which is healthier);

  1. grate a small onion and one garlic and mix with the beef. Add a little pinch of black pepper, dried mint, and salt to your taste
  2. chop finely 1/2 bunch of parsley and add to the mix
  3. sprinkle 4-5 slices of stale bread with water (also works with fresh bread, but in this case make sure to use much less water; just enough to allow them crumble in your hands when you mush them. It is okay to be hard on the bread during this process; the idea is to make little pieces of them). Drain extra water by squeezing the bread between your hands. I think you can also use bread crumbs, but I have no idea how this one would turn out; so I am sticking up with bread.
  4. Add the crumbled bread to the beef, spice, and herb mix; add one egg and mix everything really well. Some people use food processor at this stage, but I am not in favor of it; it makes everything very fine..
  5. take approximately 30 grms of the mix (or a larger one – I like my meatballs small, much smaller than the burgers. You can adjust the size of the meatball as you please) and work on it with your hands to give a round and relatively thin shape
  6. freeze, deep fry, grill, or add to the meals as you please

Bone appetite! 🙂

PS: for variety, experiment with adding other spices (such as cumin; make sure to use a little amount as cumin has a strong taste that can override the other ingredients’ aroma) or adding 1 spoon of tomato paste; I had eaten the one with the paste which had a very nice color 🙂

limiting the food waste; first blanching and pickling adventure :)

Seeing veggies go bad in my fridge makes me sad. That usually is the case with the herbs, such as parsley and cilantro, which go bad quite easily. I am getting more and more warmer to the idea of frozen food.

In my recent visit to Athens, one of the things I have done was to check a grocery store (I love it – you can find out many different things, which is always a delight for me). I particularly remember how well the frozen veggie section was; okra, spinach, beans, and others; the veggies looked real and fresh. Nothing like what I do see in my store here; frozen, discoloured, and full of little pieces of ice.).

To take this at my hand and to start keeping my veggies fresh and un-wasted, I decided to look for info on the internet (for example, this site) and talked to my mom.

I tried dicing and freezing my onions in the freezer. That is great as I use onion a lot and sometimes buy more than I can consume. I am now checking my onions time to time to pick those which seems like going bad; I chopped them up and put in my freezer last week for the first time and used some for cooking this week – it works! :).

I also learned about blanching. I tried it today with carrots and zucchini. Honestly I do not think it will work with zucchini as it is a moist veggie, but I thought I would give it a try; it is better than wasting them. I am also very hopeful about the carrots.

This is the process I followed:

  1. wash, peel, and trim the ends of carrots
  2. cut in to pieces as you wish: I had cut them in rounds as well as vertically; the latter one I love in meat meals and the round ones can be used in soups or meals. I am also planning to try mashing them up later.
  3. Boil them in water for 2 minutes. I added a little bit of salt as they say it help with keeping the colour.
  4. Immediately take the veggies and place into ice-water until they become cold (2-4 minutes). This step is supposed to stop the cooking process. I think I needed more ice in my case. next time I will put less water and more ice. TIP: blanched carrots taste and smells so good; please give it a try 🙂 I ate a couple of them – it was irresistible 🙂
  5. drain well, place in freezer bags, remove the access liquid and all the air as much as you can, label with preparation date, and place into the freezer.
round or circle cut carrots :)
round or circle cut carrots 🙂
vertical cuts; great for meat meals :)
vertical cuts; great for meat meals 🙂
they are so nicely boiling :) the bubbles made me joyful :)
they are so nicely boiling 🙂 the bubbles made me joyful 🙂
I think I needed more ice :( well, next time :)
I think I needed more ice 😦 well, next time 🙂
look at the brighter color of these lovely carrots after blanching! :) I had read somewhere, exposure to heat does this to carrot and it is supposed to be good for our body :)
look at the brighter color of these lovely carrots after blanching! 🙂 I had read somewhere, exposure to heat does this to carrot and it is supposed to be good for our body 🙂
frezzer bags are ready and labeled (at the bottom; not shown here). I am not hopeful about the zucchini but let's see how it goes :)
frezzer bags are ready and labeled (at the bottom; not shown here). I am not hopeful about the zucchini but let’s see how it goes 🙂

I also got a recipe for cabbage pickle from mom; I do not think I did follow exactly as she said, but here it is:

  1. wash and dice the cabbage (I used half a head)
  2. peel and grate 5 – 6 garlic; mix with the cabbage
  3. add 1 table spoon of chili pepper and mix; I love my pickles hot but you can adjust it as you please
  4. place the mix in jars; fill 1/3 of the jars with vinegar (I used apple vinegar)
  5. in a bowl, mix 2 table spoon of salt, 1/2 table spoon of sugar, and water; mix well. I have a feeling that I needed more salt, but then I would not like too much of salt so I am not sure how this will go.
  6. add this mixture to the jar till it is filled. My mom recommended putting something on top as a “weight”, like a small plate or something, to keep the cabbages immersed in the liquid. I did not have anything that small so I could not, but if you have place it on top prior to closing the lit. Close the lit and set aside. My mom says they will be ready for consumption in a week 🙂
I am sure it will not taste like my mom's, but not bad for the first trial :)
I am sure it will not taste like my mom’s, but not bad for the first trial 🙂

I am so excited! Not bad for a girl who does not like to cook 🙂

I am determined to do whatever I can do eliminate food waste from my life – cannot wait to try others! 🙂

cheers

Blog at WordPress.com.

Up ↑